Quick Start
Requirements
The latest versions of the following browsers are recommended for use with Vine Marketing Automation on any platform: Firefox, Google Chrome, and Safari. Vine Marketing Automation is primarily designed for desktop/laptop screen sizes and some limitations can apply for platforms with smaller screens, especially the ones with screen sizes less than nine inches.
How to start ?
To start using Vine Marketing Automation tool you can sign up for it on the main page of Vine web site . You will have a one month free trial and when it ends you can then select any package you like.
Click TRY FOR FREE or use this direct link to register and start your trial:

Fill out the form, select MA Trial and click Try Now.
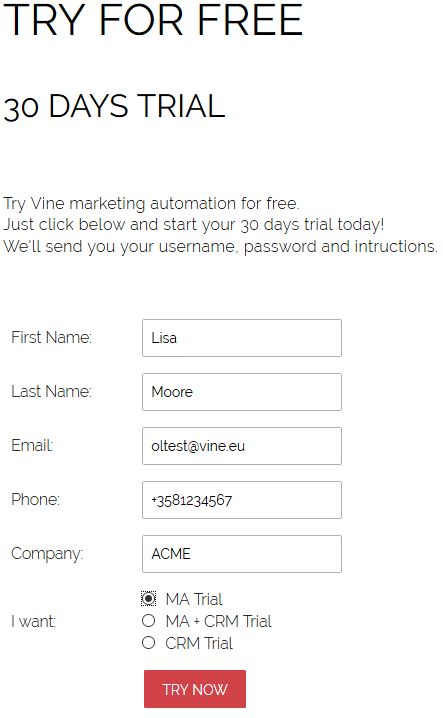
You will receive an email with your login information.
Setting up MA
Use your login information and log into Vine MA. Your browser will open a page like the following one. It already includes some demo data which you can remove when you no longer need it.
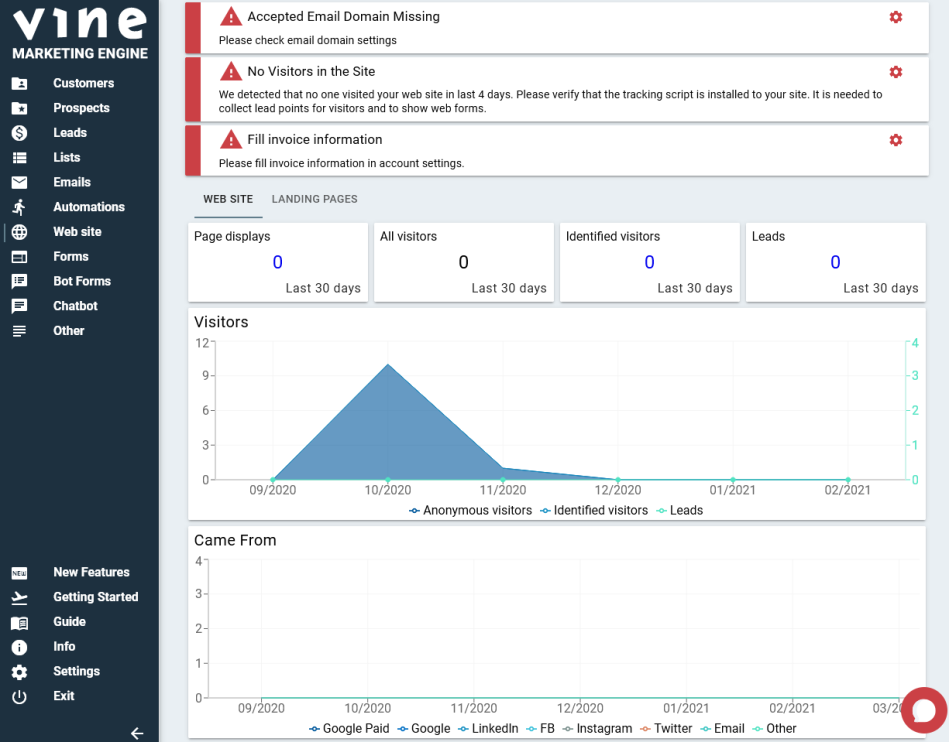
We suggest that you next go to the Settings menu to do some important configuration before starting to use MA.
Click Settings in the left hand menu.
We recommend that the first thing you do is change your password: click Change Password in the Account tab of the settings.
Enter your old password, which you received in the first email with the login information, and then enter twice a new password you want to use.
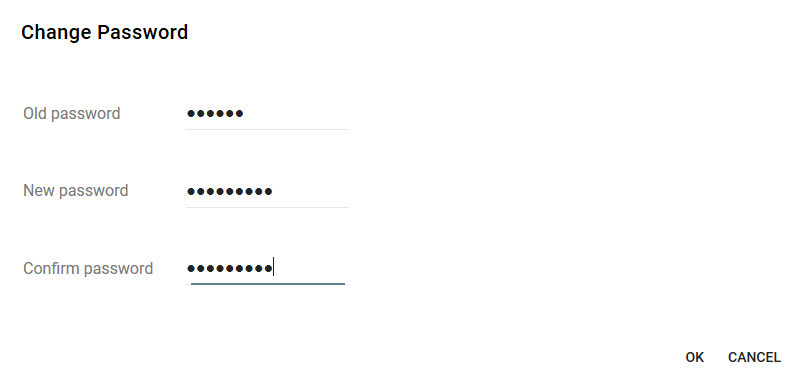
Click OK to save the new password.
If you have forgotten your password you can contact Vine support. (or use the "Forgot Password?" link in Vine CRM client login).
Setting up your Emails and Web Site
Configuring Email Sending
To enable email sending and remove the warning banner you should configure the email domain you intend to send your emails from. Click  or go to Settings->Email->Email Domain and follow the domain configuration instructions:

Configuring Tracking
Please use the Settings->Web Site->Tracking to configure the tracking for pages of your web site and check how it works.
Please note that you first need to install the script to pages you want to check.
-
Select Other and then copy the given script and add it to the HEAD or BODY part of all web pages visits to which you want to track. For example like this:
- Open all pages you want to check at least once in your web browser.
- Enter the address of your web pages to check if the script is installed correctly:
Installing Vine Tracking Script
<html>
<head>
<script src="https://vine.eu/track/t.js?sg=326512268" > </script>
If adding to the BODY part then you have to place the script as high as possible, for example:
Installing Vine Tracking Script to the Body
<body>

<script src="https://vine.eu/track/t.js?sg=326512268" > </script>
Now you can be sure that this page will be tracked correctly. In this way you can check all the pages you want to be tracked.
Loading Data for your First Target Group from Address Service
To send a marketing email you will need to create an email list which includes persons from your database. You can add persons to your database in many ways, for example, manually creating persons in Marketing Automation or Vine CRM, exporting data from an Excel list, loading data from the Vine Address Service. If you just started using Marketing Automation then you can use the Address Service to populate your database with good data as it has access to thousands of Finnish companies and decision making people.
Configuring Address Service Settings
Before loading data using the Address Service, it is very important that you configure Address Service settings.
- First you need to select an email list where all the loaded persons will be added. If you need a new list, you can create it on the Lists page:
- Next, you should decide if you want all persons or only persons with email addresses present. If you plan to send emails to contacts in your database then you obviously need persons with email addresses. Another thing to consider is whether you want to include only persons with already present email addresses or you also want to include persons who do not have email addresses but whose email addresses can be generated by Vine. Please note that Vine tries to generate email addresses using the most common way of creating corporate email addresses, such as "firstname.lastname@companydomain".
- In addition, you need to decide if you want your downloaded group to strictly include only companies and persons which satisfy your criteria or you want the group to be able to grow by also loading all employee persons for companies matching your search.
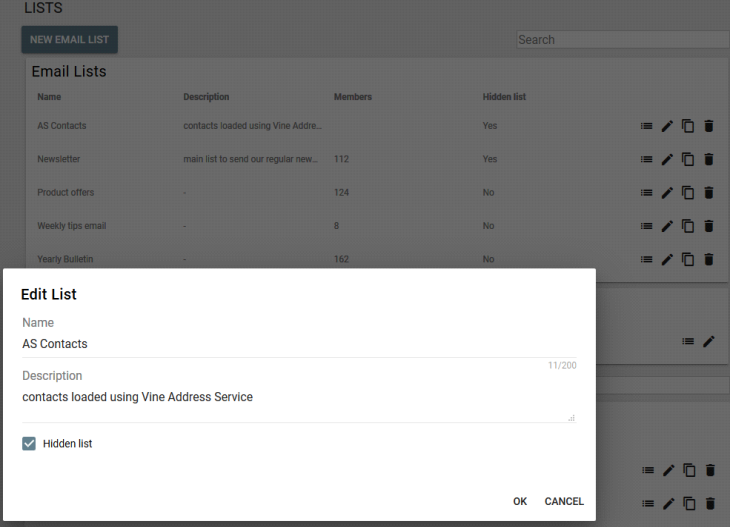
Select Hidden list as you most likely do not want this list to be publicly available online on your Customer Web.
Now you can select a new list:

For example:
- You want to add to your database all managing directors of advertizing companies. And you want only those who have email addresses to be able to contact them later.
Then you need the following settings:
And your Address Service load could be like this:
- You want to load ALL possible contacts from advertizing companies which have managing directors. Then your load search will be the same as the one above, but the settings could be like this:
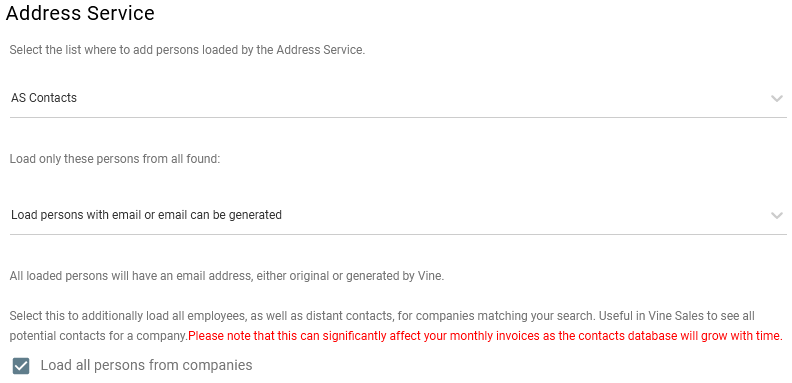
Note the following changes in the settings:
Load persons with email or email can be generated is now selected as you want to be able to try to contact even those contacts who do not have email addresses listed in the Address Service database, but whose email addresses could be guessed and generated by Vine.
Load all persons from companies is now selected as you want to load all possible contacts from advertizing companies which are supervised by managing directors.
Loading Data Using Address Service
Open the Lists page, and select Members  from the
  menu for the "AS Contacts" list. Then click
  and select Load from Address Service from the list that will appear.
Please note that the Current status pane shows how many companies and persons are already in your database. If you have not yet loaded or added data to your database then there should be only your company and users in the database:

If the Current Status pane shows much more companies and persons then please check if you still have demo data in your database. It is recommended to remove demo data from the database before you start any real usage of Marketing Automation.
- First, from the Industry list, select the industries you want to limit the companies of your loaded contacts to.
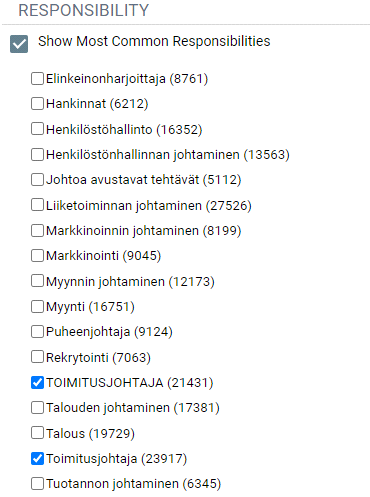
If needed type a key word in the search box to see only industries with your key word: - From the Responsibility list, select types of jobs you want your loaded contacts to have.
- To refine your search further, you can apply Additional Filters to companies.
- Click Calculate to see the resulting amount of companies and persons in your load group. Please note that the amount of persons and companies listed says how many objects will be loaded if Load all persons from companies is not selected. If you select it, then more data will be loaded now and it is likely that even more data could be loaded later in nightly updates of your database.
- If you are happy with the Result estimates then click Load to add the data to your database. The following confirmation dialog will appear:
- Click OK to load the data. Please wait until the data finishes loading. You can now check how many objects have been loaded in the Current Status pane:
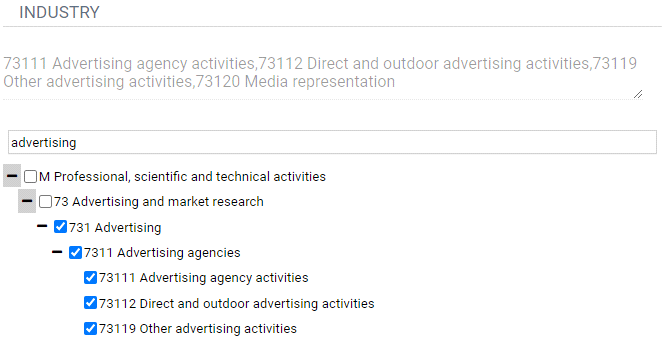
Note that the list at the top always shows all selected industries regardless of the filtered list below.
Select Show Most Common Responsibilities to reduce the number of shown responsibilities and see only the most common ones.
Now you have defined a search which will find advertizing companies which have managing directors and then load such companies and their managing directors.
For example, using the following limiting conditions you will only have managing directors of companies with personnel more than 30 employees and turnover higher than 100 k

Please remember that your monthly invoice depends on the number of persons (contacts) in your database. For the exact prices, you can refer to your contract or you can check Vine default prices here.


Creating Your First Web Form
About Web Forms
Using the Web Forms tool you can create and add person forms to HTML pages of your web site. The forms can identify the visitor and save data to the database.
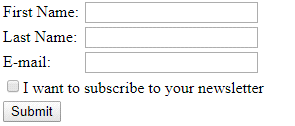
For example, you can create a simple Newsletter Subscription form that will ask a new web site visitor for name and email address. If the visitor then selects "I want to subscribe" and clicks Submit then a new person will be created and added to a specific email list that you have set when creating this form:
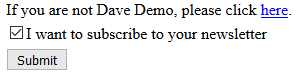
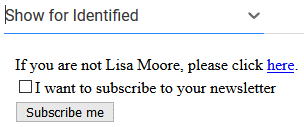
Important functionality of the form is that it recognizes a returning visitor who already registered at your site earlier. For this it uses data stored in web browser cookies and if the visitor is recognized then the form won't show the name and email fields as those are already available in the database. The visitor only needs to select the check box to subscribe to the newsletter:
We will now guide you how to create this simple form.
How To Create a Web Form
How to Create a New Web Form from Template
When creating a new web form you can choose from a set of typical web forms, such as Download Document, Event Registration, Contact Data Request and other forms.
- Please click Forms in the left menu to go to the Forms page.
- Click
 .
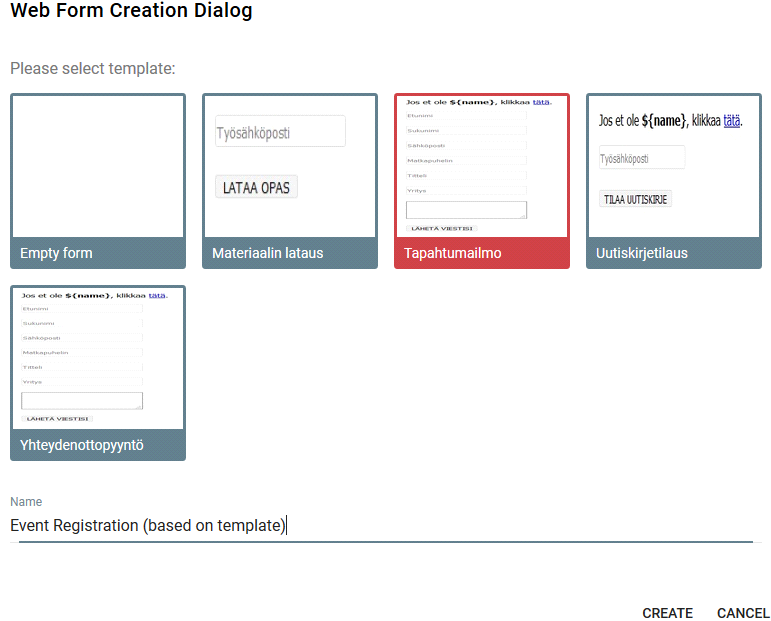
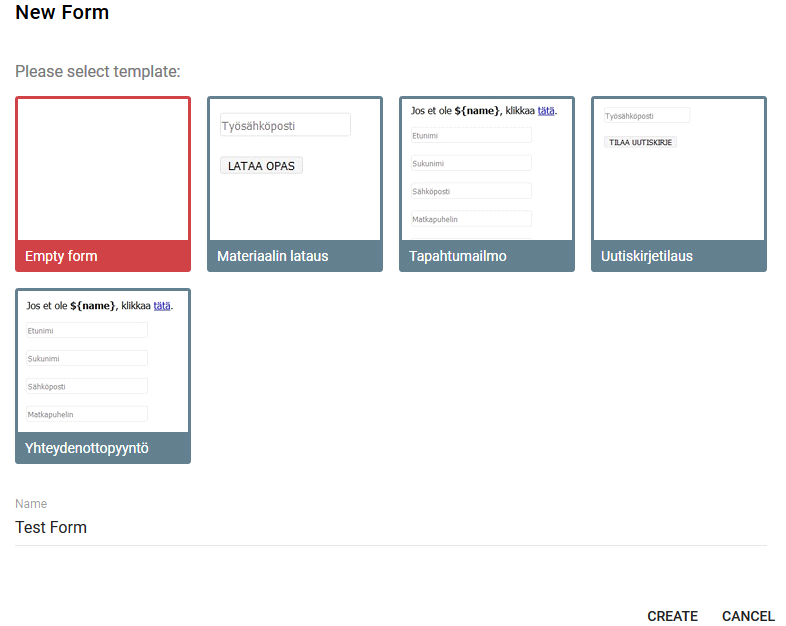
. - Select a form template and then enter a name for your form:
How to Create a New Web Form from scratch
Let us try to create a form from scratch where a site visitor can subscribe for your newsletter. If a person is recognized, then it will show only the "Submit" button,
- Please click Forms in the left menu to go to the Forms page.
- Click .
- To create a new form from scratch, select Empty form and then enter a name for your form:
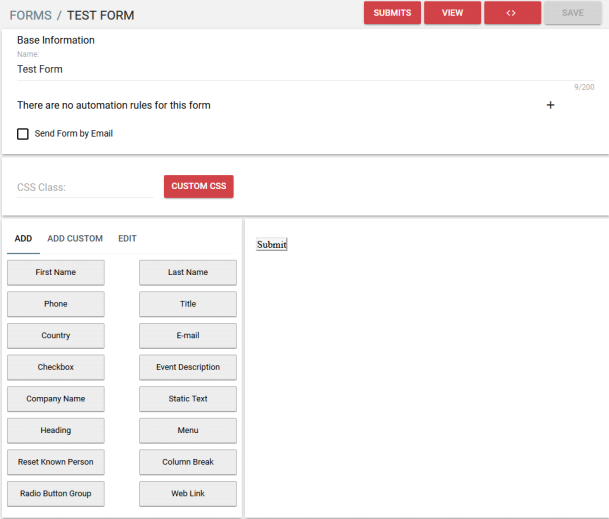
- Click Create. Your new, so far empty, form will appear.
- On the right, you can see your first form which right now does not include anything except the Submit button.
- Click the Add tab to open a tabbed page which includes fields whose values can be saved to the Vine database. To add a field to your form just drag it to the form on the right.
- Let's first drag the First Name field to the form. You should drag all fields to the area above the Submit button:
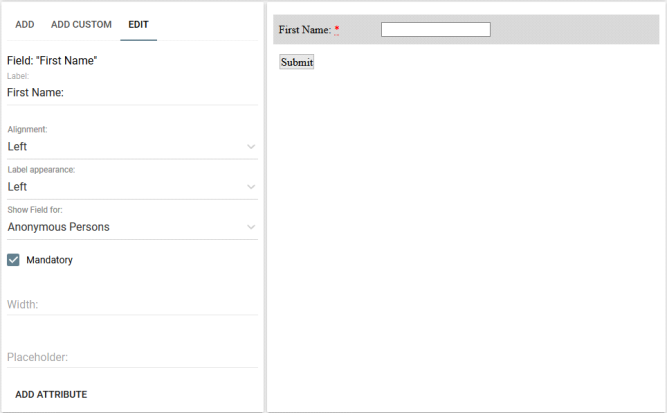
- When you add a field to the form, it gets selected and automatically the Edit tab opens which includes options for the selected field. Note the Show Field For setting which you can use to set if you want the field to be visible to all web form visitors or only to those recognized (using cookies) or only to anonymous visitors. Naturally, please select Anonymous Persons as you want only anonymous persons to enter their name and email address:
- In the same way please add the "Last Name " and "E-mail" fields to the form. Set Show Field For to Anonymous Persons for both:
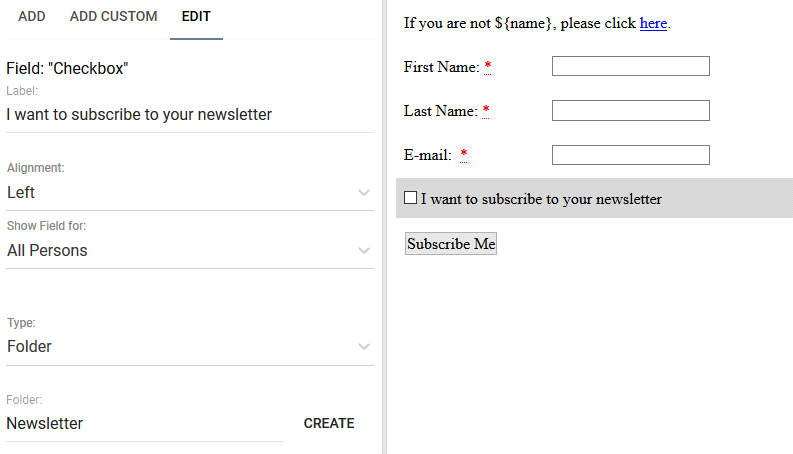
- Now let's add the registration capability to this form. For this, please drag the Checkbox field to the bottom of the form (but above the Submit button).
Edit its Label to "I want to subscribe to your newsletter" and set Show Field For to All Persons as we want both already known and anonymous people to be able to sign up for our newsletter.
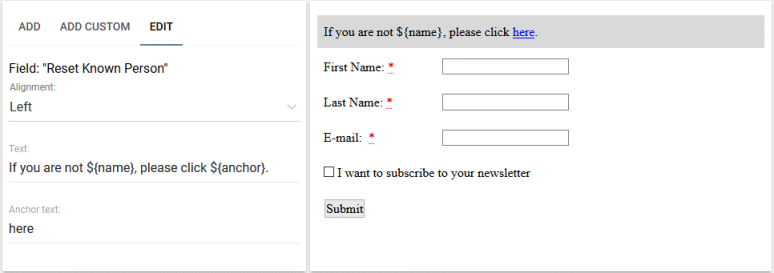
Then please set the Type of the checkbox to Folder and use the Folder field to enter and select the email list where you want subscribed persons to be added. (Please refer to the Checkbox types chapter if you want more information.) - Usually it's a good idea to add the Reset Known Person field to the top of the form.
- Our form is almost ready.
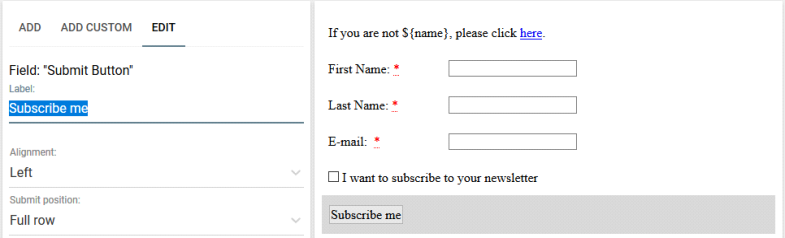
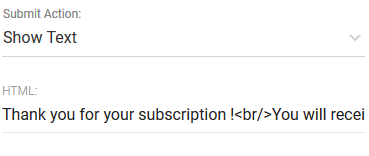
- Let's rename "Submit" to something more meaningful like "Subscribe me". For this select the Submit field and change its Label field.
- And let's add a message which the user will see after "Subscribe me" has been clicked. Please select Show Text under Submit Action. Enter text formatted as HTML that will be shown to the user. Let's enter something simple like : "Thank you for your subscription !<br/>You will receive our latest newsletter shortly."
- Click
 to save the form!
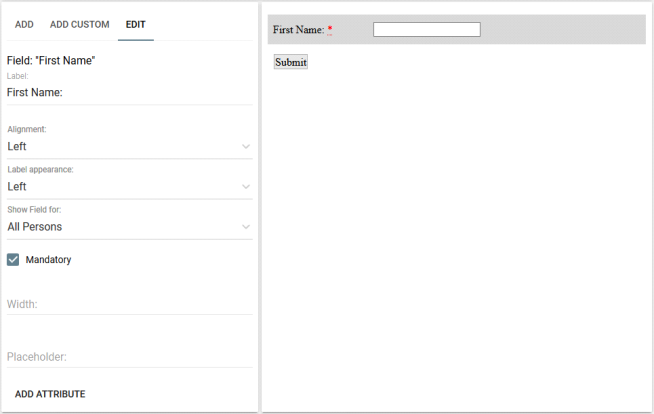
Please also note the selected Mandatory setting. Using this setting we will require the form visitor to enter the field. All mandatory fields have a red asterisk next to them
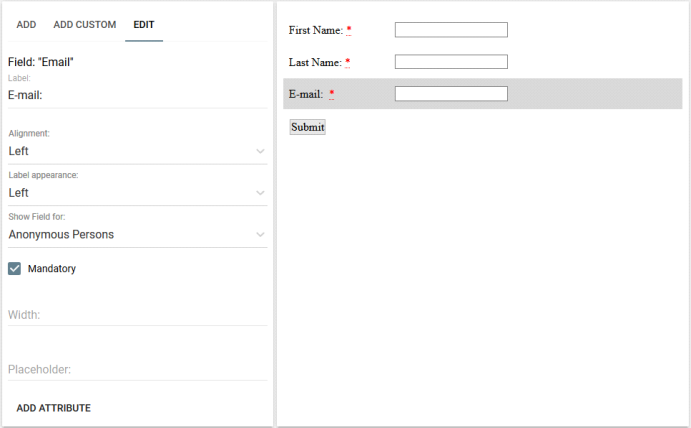
Select Mandatory as with this form we do not want visitors who do not want to subscribe to be able to click Submit.
Now to test our form click  .
.
First, select Show for Identified to check how your form will look for a known site visitor:
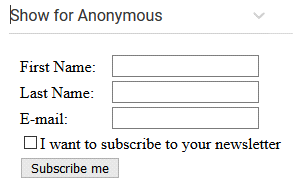
Then, select Show for Anonymous and you should see your form empty:
Fill in the from and click Submit:
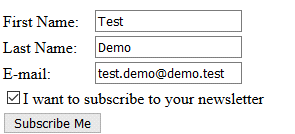
You should see the following text now:

If you want to test the form in a real web page then please use the  button to copy a special code to your web page.
Creating Your First Automation
About Marketing Automation
Using the Vine Marketing Automation tool you can automate all the typical e-marketing steps, such as:
- Tracking lead activity of your web site visitors. You can automatically log such typical actions as visiting web site pages, using web forms, downloading documents, or registering for events.
- Analyzing activity. In real time, your triggers can monitor various lead parameters and activate automation sequences based on those. For example, your triggers can activate when a lead score becomes higher (or smaller) than a certain number. Or they can activate on specific actions, such as visiting a certain web page or registering for an event.
- Running automated workflows. You can create quite elaborate automation workflows with multiple routes which can convert raised sales leads into customers. You can find a few examples of automation workflows here.
How to Create an Automation
- Please go to the Automations page by clicking Automations in the left menu.
- Click
 to create a new rule.
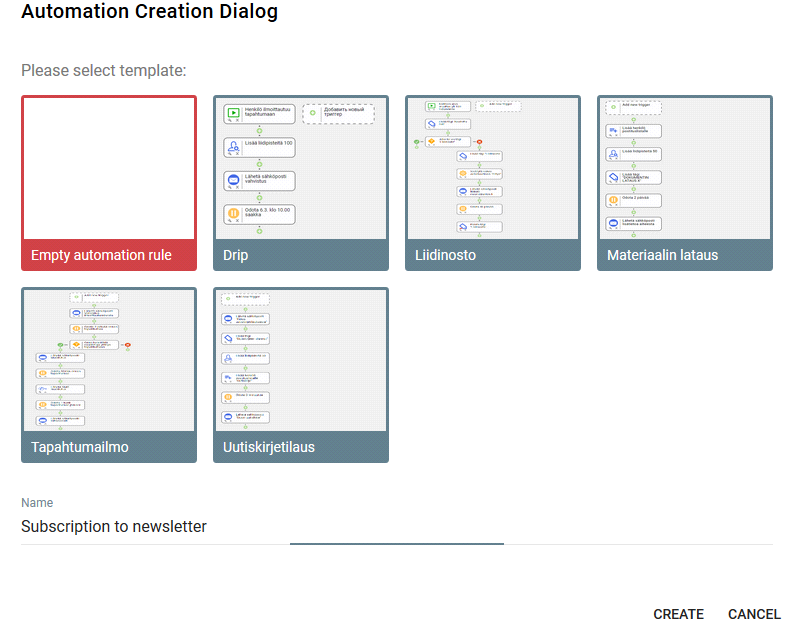
 - To create a new rule from scratch, select Empty automation rule and then enter a name for your rule:
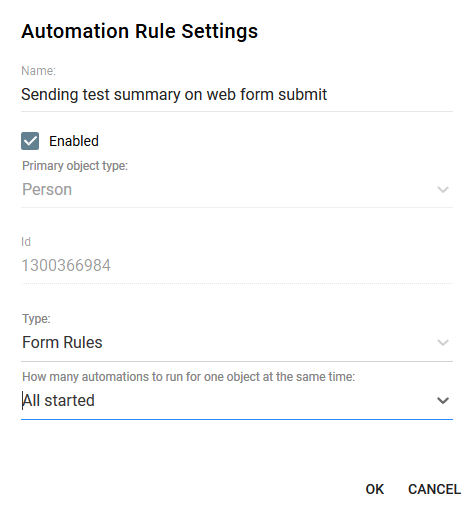
- Click Create. The Automation Rule Settings dialog will appear for your new rule.
- For a new empty rule with no actions you cannot select Enabled as there is nothing yet to enable.
-
Select a Primary object type for your rule. The primary object type is the object type that will be triggering your rule. For example, we will create a rule which will trigger when someone (a person) is subscribed(added) to a newsletter list(folder). Since a person object will trigger our rule let's select Person as our Primary object type.
Please note that you won't be able to change that later when you add some triggers and/or actions. - Select an automation type from the Type list to categorize your automation. This will not affect how your automation acts, but can make it visible or not in specific tools and places in MA and Vine CRM. Let's select Form rules as we want to be able to start this automation from a web form.
- Leave the default setting One: do not start new one if one is running already for How many automations to run for one object at the same time. (For example, this can prevent triggering the rule multiple times if a form is constructed so that the user can click Submit several times. But normally a form should show some text after Submit clicked or redirect to another web page.)
- Click Save when you have finished editing your rule.
(The rule will be assigned an ID which might be needed, for example, when using custom web forms.)

Adding Subscribe Trigger
- Click
 next to Add new trigger to create a trigger.
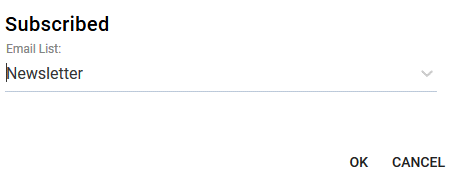
- In the Create Trigger dialog, select Subscribed to create a trigger that will be activated when someone subscribes for a newsletter (for example using the Newsletter Subscription web form you have created).
- In the Subscribe dialog, enter a name of the trigger and select an email list which will trigger the rule when a new person added to the list.
-
Click OK.
Adding Send Email Automation Action
- Click below the Subscribed trigger to add an activity to your workflow. Please refer to the
Creating Activities section for detailed information about how to create activities.
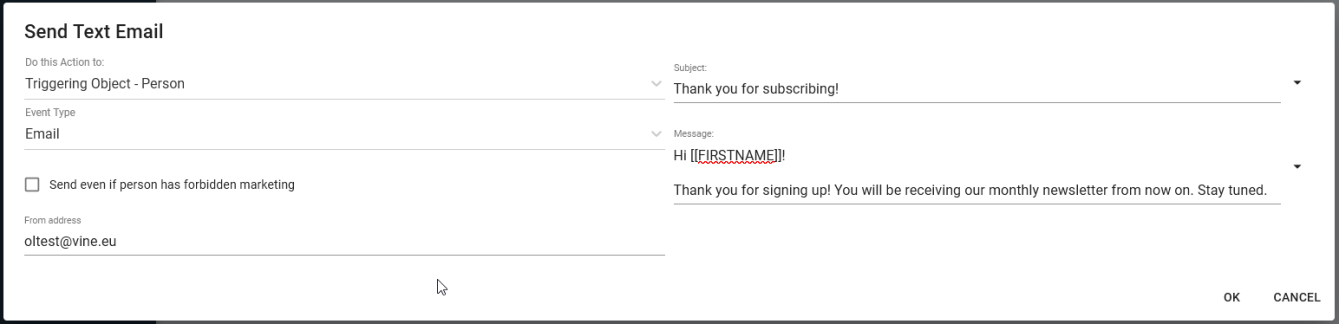
- In the Create Activity dialog, select Send Text Email. Using this action we will be able to send plain text emails to subscribed persons. ( To send an email designed in the Emails tool you will need the Send Email action.)
-
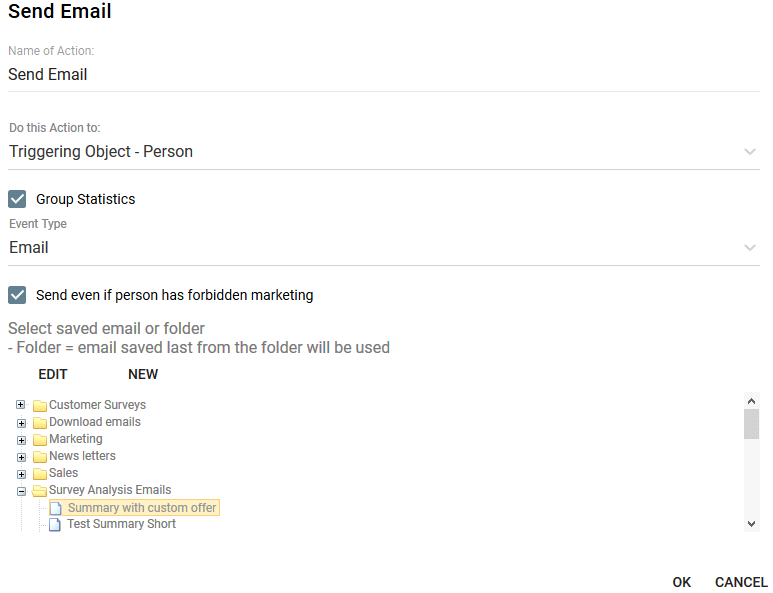
The target object of the action will be shown in the Do this action to field. In this case there will be only one option "Triggering Object - Person". This means that the email will be sent to the lead who subscribed to the newsletter and triggered this rule.
- Select Email from the Event Type list. (This type is important if you use Vine CRM.)
- Do not select Send even if person has forbidden marketing. This should be selected only in rare cases when you need to send an email to persons who explicitly asked you to not send e-marketing messages to them.
-
Set the "From" address for emails sent by this automation action using the From address field. If you do not want recipients to reply to this email then the name should clearly indicate that. For example, like "DoNotReply@acme.test"
-
Enter the email subject and the body of the message.
In the subject and body you can enter placeholders for object fields. Place the cursor where you want a placeholder to be located, click next to the edited field and select a field from the list that will appear.
- Click OK in the Send Text Email action dialog to store your email and its settings.
Using Object Fields in Emails
To create email content you need to enter its subject and message body. In subject and message you can refer to recipient's fields and, if a web form starts an automation, then you can also refer to web form fields. In our sample, the Subscription form triggers an automation so we can refer to the web form fields as well.
This email will be sent right after someone subscribes to your newsletter, so the email can be used to confirm the subscription and send any additional information to the subscriber.
For this email we will use the following subject line "Thank you for subscribing!".
Let's start our email message with personal greeting. For this we can use the firstname and last name of the person that triggered the email. Place the cursor right after "Hi " and then click next to the Message field and then select "First Name" under "Triggering Object-Person":
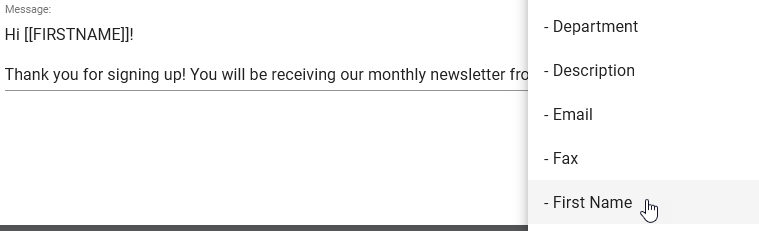
You will get the person firstname field added:
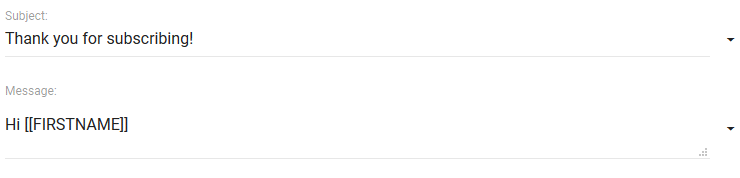
After that enter any text you like. Please note that to get access to some extra fields you need to use [[]]-nottation (more about this).

Note: Do not forget to click  for the whole automation rule or all your changes could be lost!
Testing automations
You can test your automation now.
Click  to verify that the rule has
Creating and Sending Your First Email
How to create a marketing email
- Click Emails in the left pane.
- Click New in the menu at the top.
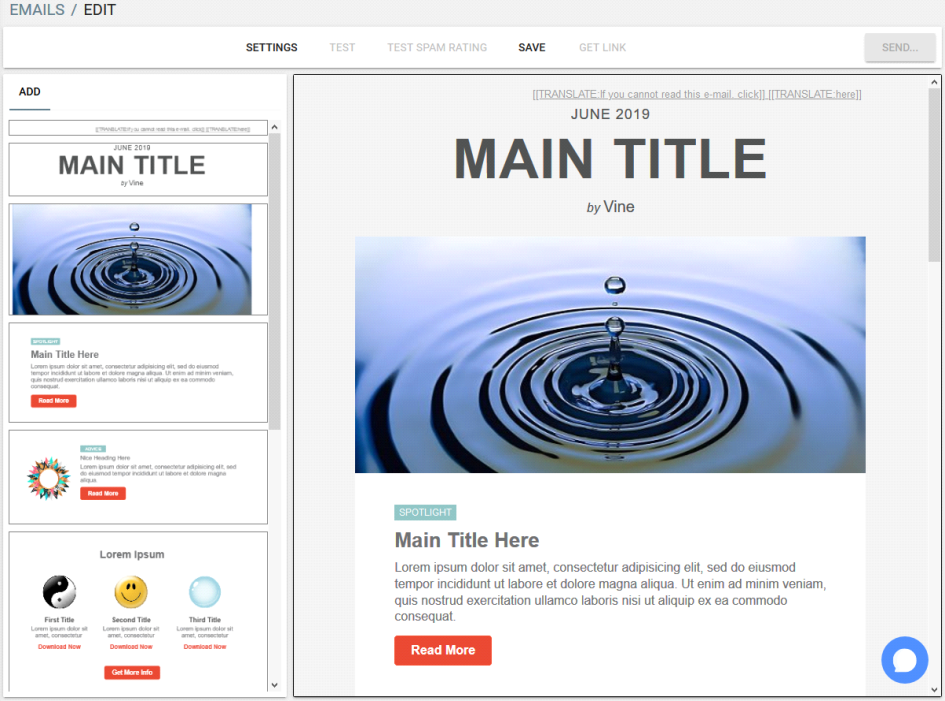
- On the next EMAILS/NEW EMAIL page:
- Click Select to choose the shown template and go to the next EDIT page where you can edit the email and its settings:
Select a template you want to use.
(If there are no templates shown then you should add the demo data using the Settings menu or create your own email templates using the Email Templates tool.)
How to set email sender and other settings
Click SETTINGS and type in the needed values of the From / Reply / Sender and Subject fields.
Use valid From & Reply address so that recipients could potentially contact you. You can use different From & Reply addresses if really needed, but it is recommended that both would be from the same domain and related to the same company.
Note: You cannot send an email if the domain of its From address has not been confirmed. You can confirm and configure email domains on the Email tab of the Settings.
It is recommended to set the Sender name to your company or brand name as this makes it likely that more recipients will recognize the sender and will be interested to open the email.
Enter a short and clear Subject line. Consider personalizing subject!
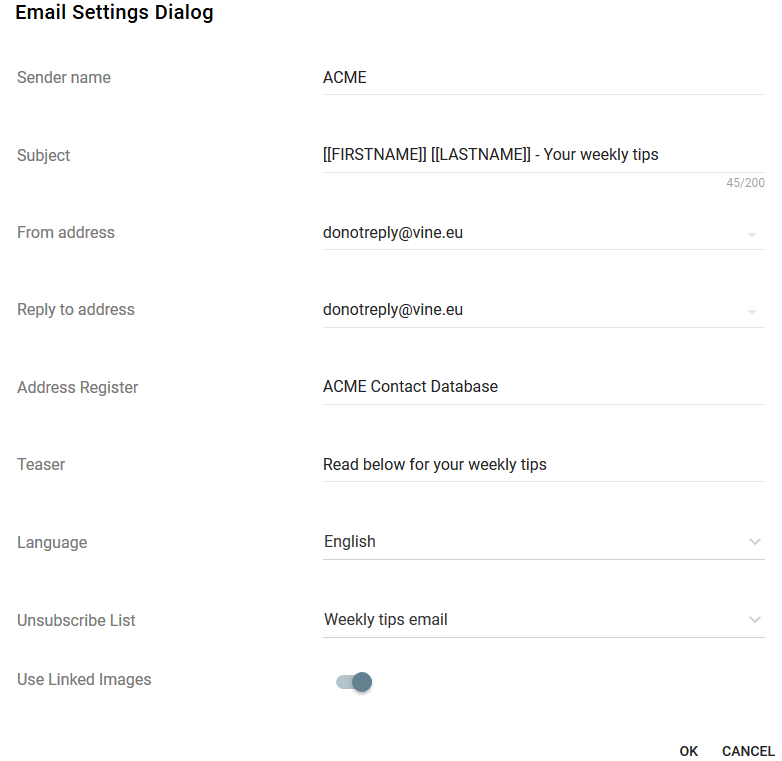
Use the Language setting to specify the language for standard email parts, such as, "if you cannot read this email, click here", "unsubscribe". These will be translated automatically.
In the Address Register field you can specify the source of target contact data for this email.
In the Subject field you can refer to the recipient's person fields using the [[]] notation.
From the Unsubscribe List select an email list which you want the user to be removed from if the email recipient clicks the Unsubscribe link in this email.
Select Use Linked Images if you want to include only links to your images and do not embed the images in email.
How to organize chapters
Vine emails consist of chapters which are highlighted by a "dashed" line around them . You can add a chapter by simply dragging it from the list of chapters on the left to the desired place in your email.
You can remove a chapter by clicking the cross, and move a chapter by clicking the Up and Down arrows.
How to edit chapters
You can edit the content of each chapter, but the limits to what you can do to a chapter are set in the template that the email is using. Usually you can freely edit text, replace images, define links & buttons and remove chapter elements completely:
Editing Text
Click in the text you want to edit and use the editor buttons. Each button has a tooltip, but if you need more information about a specific command, you can find it here.
Replacing Images
Click an image to select it:
- If you want to insert an image previously used with this email, then select it from the Select image list at the bottom.
- If you want to insert a new image from your disk, then click UPLOAD IMAGE to find and load it.
Setting Links/Buttons
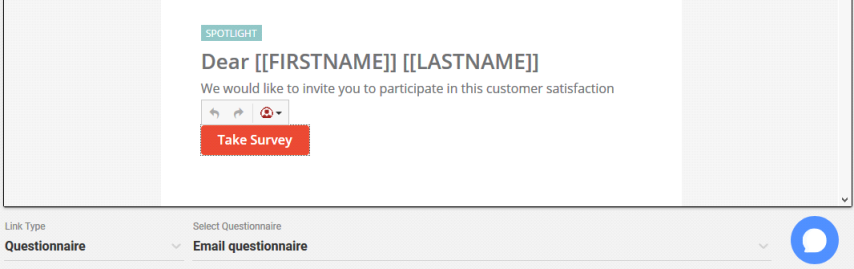
To set the address/action for a link or a button you should click it and then first select its type from the Link Type list and then enter a web address or select an object depending on what type you have chosen.
Testing Email
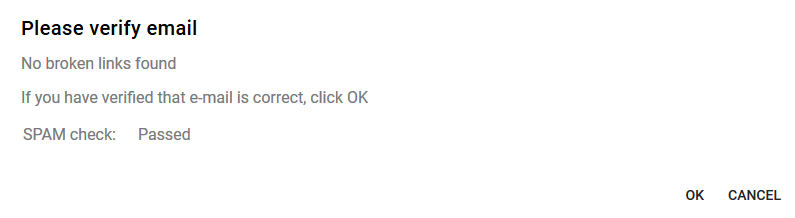
- Click TEST to verify the spam score of the email and send it to you.
- If the spam check is not passed then you need to click Cancel and click TEST SPAM RATING for a detailed spam analysis. (Normally, you should not experience spam issues with the demo email unless you use email accounts such as GMAIL or use different From and Reply addresses)
- Check the Inbox in your email application and verify how the email looks and if it has the correct Subject, Message and From fields. Check that all links work properly.
- Click OK button and the Next button will be enabled.
Saving email
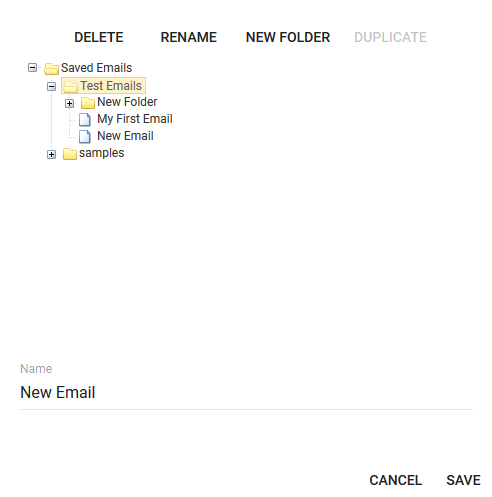
- Click SAVE to save the current email.
- In the dialog that will appear, select a folder or create a new one.
- Type a name of your email.
- Click SAVE.
How to send your first marketing email
Selecting Email
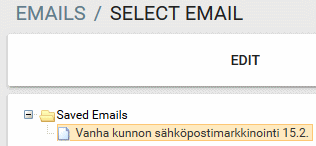
- Click Emails in the left pane.
- On the Emails tabbed page click the email you want to send
- Click Send to go to selecting email recipients.
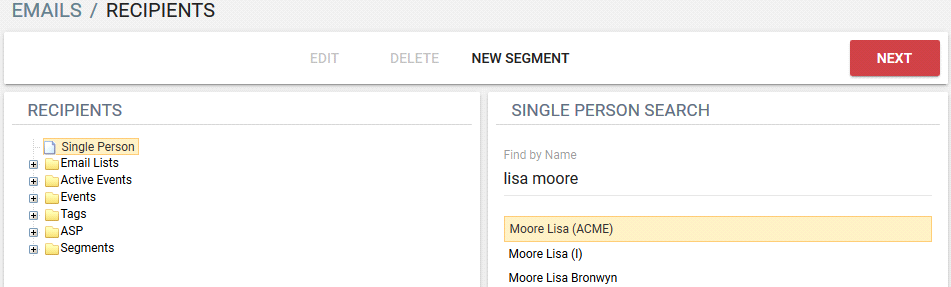
Selecting Target Segment
Select a group of recipients for your email or select Single Person if you want to send email to one person only. For a single person use the Single Person Search box to find and select the person you want to send your email to:
Click NEXT to go to the next page where you can send your email.
Sending Email
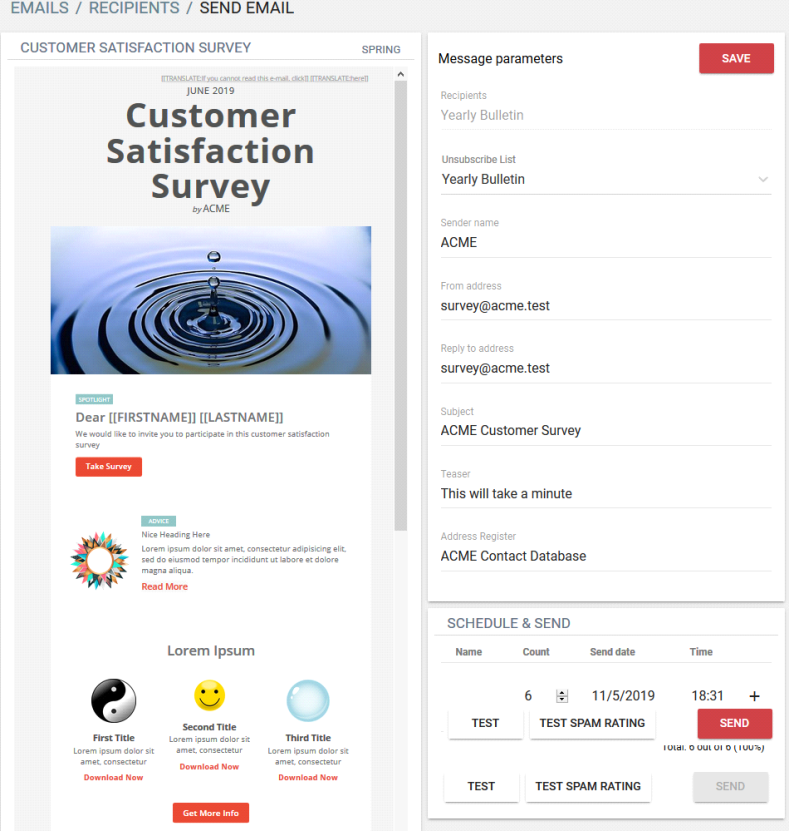
On the SEND EMAIL page first verify that the Sender name, the From & Reply addresses are correct. We recommend setting those to your name and email addresses, respectively.
- Before sending the e-mails you should specify when you want the emails to be sent. You can split sending emails into several batches instead of sending all your emails at once.
- Click +/- to add / remove a delivery batch.
- Optionally, you can specify a name and number of sent emails for each batch delivery. The name you give to a batch delivery will be used in the event name created for this delivery.
- Click Send to deliver the email to all members of the target group.
Analyzing Results
For each email campaign, it is extremely important to carefully analyze the results you get before starting a new campaign or proceeding to the next step of the existing one. It is important to compare the results you get to average results and see if you are doing fine or if you should think about ways to improve your emails.
Please note that it is quite common that those who start email marketing overestimate it results. They expect almost about half of recipients to somehow act on their emails. In reality however, the studies show that recipients tend to simply open less than 20% of great emails sent to well targeted groups. The general rule of thumb is that if your recipients open about 10-20% of sent emails and click links in about 10-20% of those, then you are right on track. If your statistics is much lower than that you should think about improving the email quality or/and building a better target group.
Where to find email statistics?
You can find the main statistics summary chart for all emails your company sent on the Statistics tab of the Emails page . (In addition, there are separate charts for customers on the Customers page, and for prospects on the Prospects page.)
The Summary chart visually shows how many people opened or clicked an email from you compared to how many emails you sent:

The chart contains the following data:
- Emails - how many emails sent using the Emails tool.
- Opens - how many emails were opened.
- Clicks - how many emails in which recipients clicked a link.
You can hover the mouse over any month to see the statistics for this month only. For example, on the image you can see how many email have been sent in February 2018, with about 13% of those opened, and about 1% clicked.
Below the chart there is a configurable statistics pane showing data for emails sent in a specified period and then below there is statistics for individual emails which you can further drill down to see all the available metrics.

For more information about email statistics and its many metrics please refer to the Email Statistics chapter.
Tips for better email results
You can find a lot of material on the Internet about how to create a good marketing email which will end up in target users' mailboxes and eventually gets opened and clicked. That is why we will not go into detail but will give you some tips you can start from and which we ourselves found working. These tips assume that the email has already passed all the SPAM filters and is visible in the recipient mailbox. (To make sure the email is not filtered out by spam filters you should keep the spam score as low as possible when testing your email.) Please also read our tips for email marketing and a blog post about how to succeed in email marketing.
- Subject line. This is what the user reads first and then decides if it is worth it to open this specific email. Personalizing email subjects with recipients first and last name usually works very well.
-
"From" should be recognizable name or company name.

How to Create a Bot Form to Download Files
Let us illustrate how you can use Vine Marketing to solve a common task when the user wants to download some documents from your site. One way to do this is to use a bot form that will ask the user to choose files for downloaded and then trigger an automation rule which will send emails with download links.
We will need the following:- A bot form that will:
- identify the user or ask to register an anonymous user
- help the user to choose files to be downloaded
- trigger a special automation rule
- An automation rule that will trigger on the form submit and send emails with download links.
- Personalized emails with links to download selected files. One email for each file.
Creating a Bot Form
If you need detailed instructions about how to create a bot form, you can find those in the Bot Forms chapter.
Here is a sample form with all the required steps and with short comments for each step:
- The first step is shown only to identified persons. Here we greet the users by name using the Person Name ({{name}}) tag that will be replaced by the user real name. The Reset Identity (click here) tag allows the user to reset the name and register again if for some reason the identification has been wrong.
- The second step is only shown to anonymous persons. We greet the users and ask them to register.
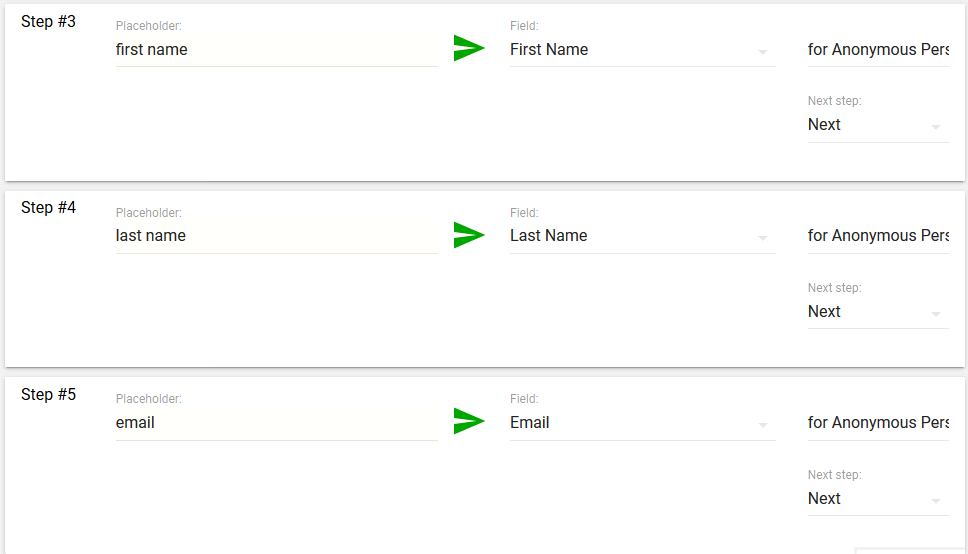
- The next three steps are also shown only to anonymous persons and allow the users to register by providing their first and last names and email address:
- In steps 6 and 7, both identified and anonymous users are asked to select a document for download.
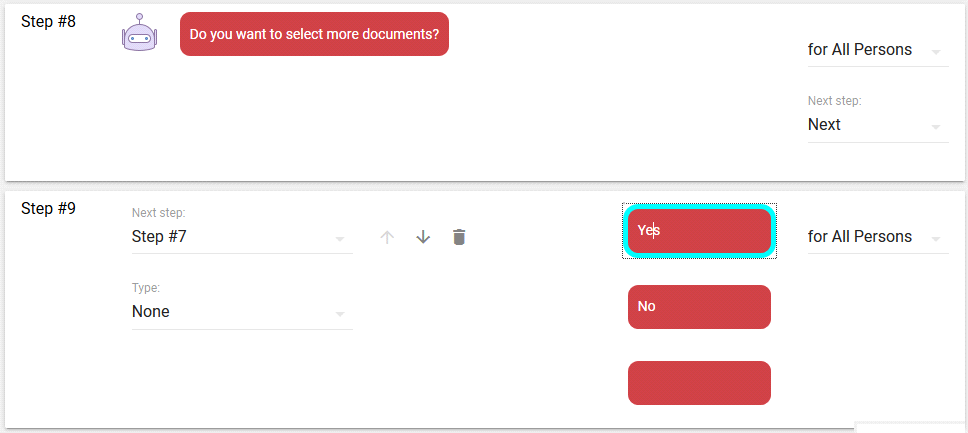
In step 6 we ask the user: - In step 8, we ask if the users want to select more documents and direct those who click "Yes" back to step 7 to select one more document. Thus the user can select as many documents as needed until selecting No on this step.
- The step 10 is where we submit the form which sends all the collected data to the Vine server for processing.
- The step 10 is the final step where we close the form.


And in step 7 the user selects one document by clicking a corresponding button. Depending on the selected document, the user is assigned a corresponding tag :
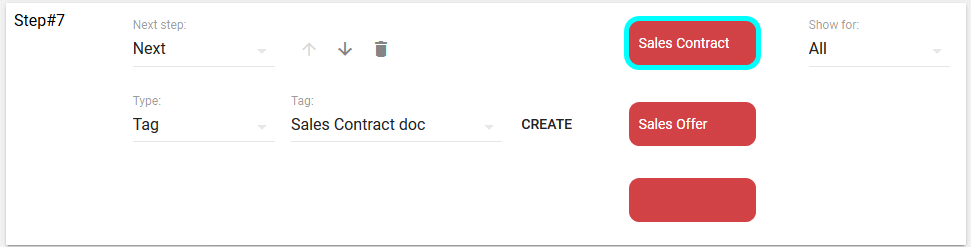
If needed you can create a tag by clicking Create.


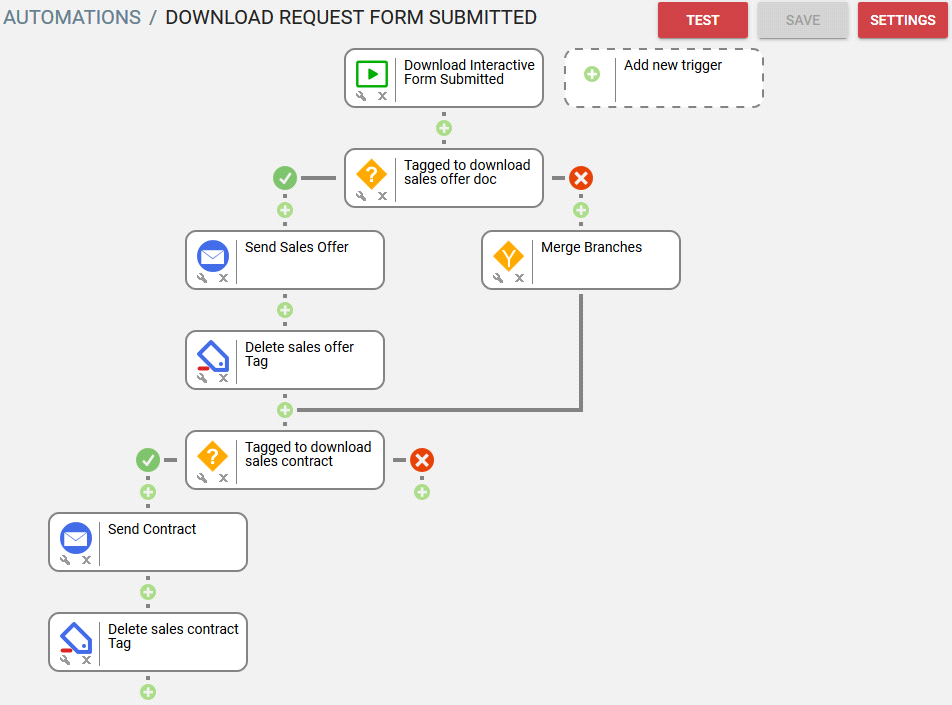
Download Request Automation Rule
This automation will trigger at the end of our bot form (when the form is submitted) and will send emails with download links for all selected documents.
Please note that we clear the tag after the corresponding email is sent. This is to make sure that the users always receive only the documents they asked for. For example, if they start our bot form later to receive some document again.
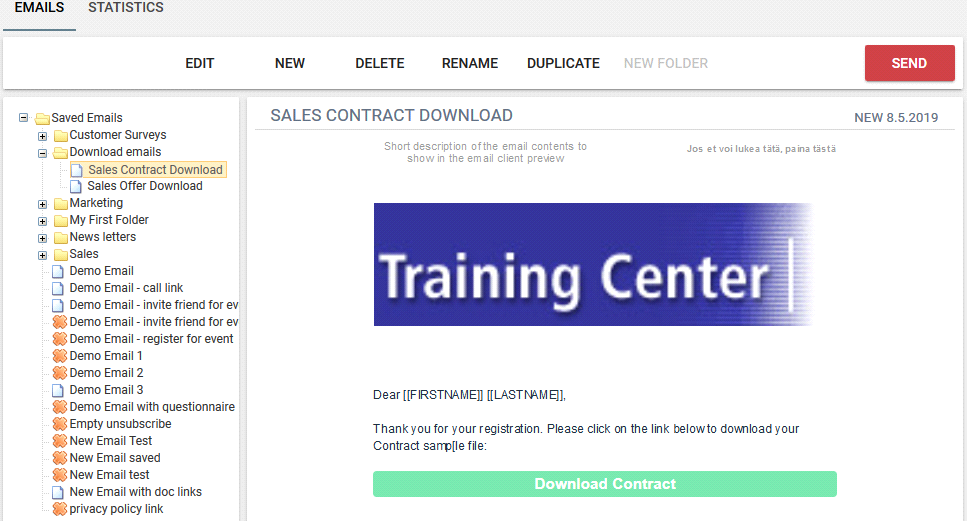
Email with a Download Link
In addition, for each document, we need a separate email with a link to the document. The automation rule will send these emails to users who have the corresponding tags.
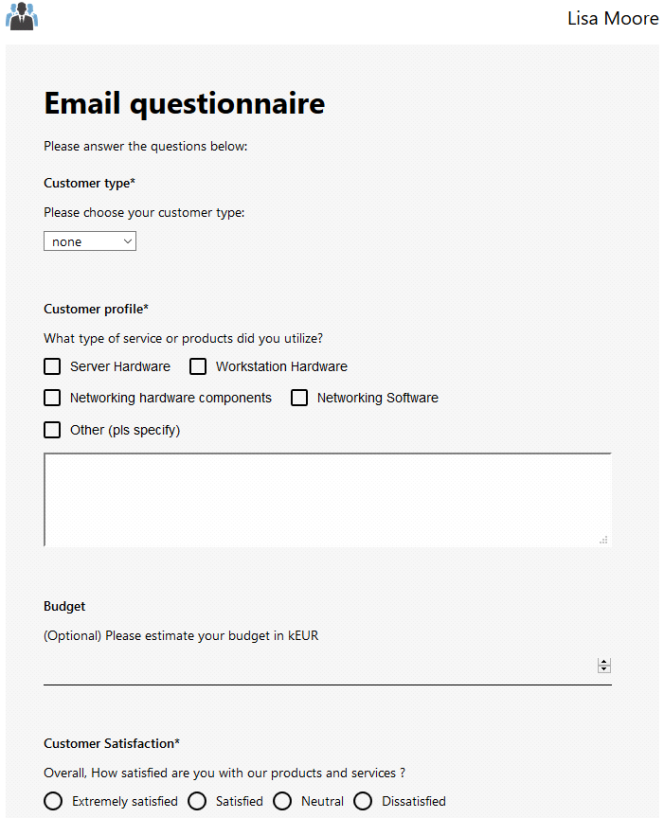
How to Create and Use a Customer Questionnaire
Vine Marketing Automation includes all the necessary tools for you to create, publish, distribute a questionnaire and then analyze its results. Each of your customers will receive an email with a link to your questionnaire. They will be able to click the link and open the questionnaire on Vine Customer Web where they can answer all the questions online:
Here are simple steps which you can follow to conduct a customer survey from scratch:
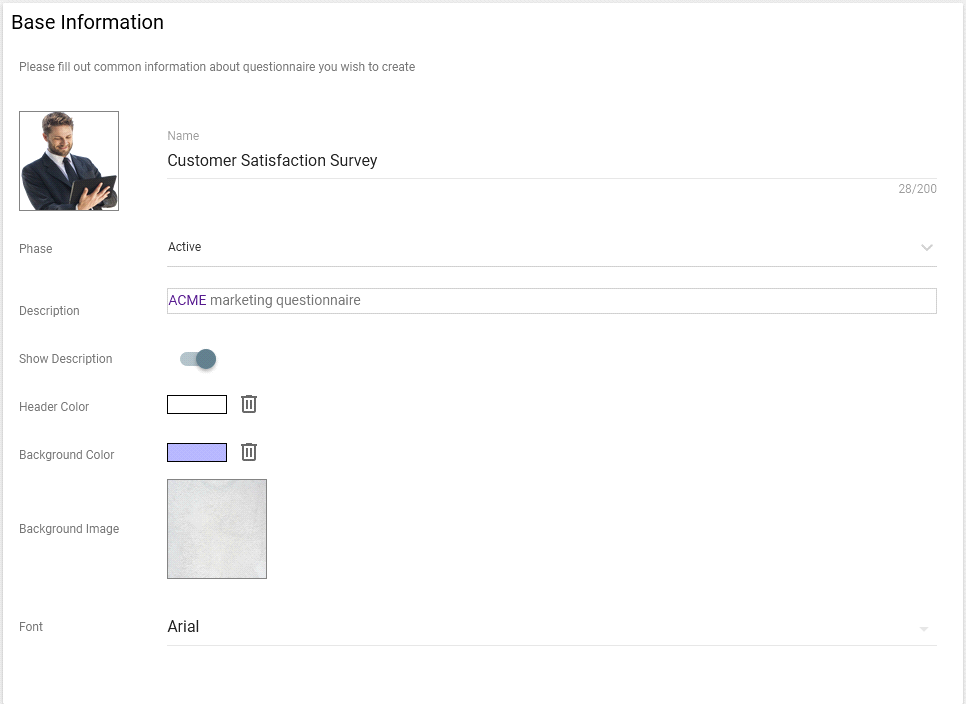
Step 1. Create a Questionnaire
To create a new questionnaire, please select Other in the main menu on the left, click the Questionnaires tab at the top of the Other page, and then click  on the Questionnaires page. The dialog will appear where you can create a questionnaire.
If you need detailed information about how to create a questionnaire please refer to the Creating Questionnaires chapter in the Other section of this guide.
Step 2. Create and Send Mass Email with a Questionnaire Link
Step 2a. Create an email and add a link to your questionnaire:
Design a new email or use an existing email template and add a link to your questionnaire there:
To start an Email creation tool please select Emails in the main menu on the left and then click
 .
.
For short instructions on creating emails please refer to the Creating emails chapter in this section.
If you need detailed information about how to create an email and its settings please refer to the Creating New Emails chapter in the Emails section of this guide.
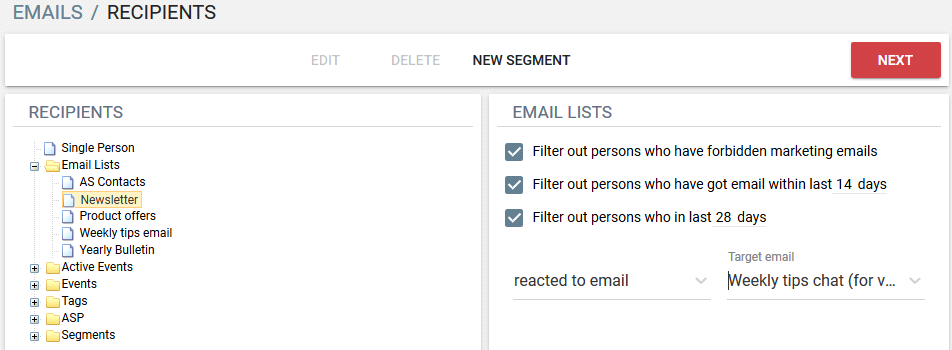
Step 2b. Build your target group
After creating your email with a link to your questionnaire, click Next to go to the Recipients page where you can build a new target group or locate an existing one :
For short instructions on selecting a target segment please refer to the Selecting Segment chapter in this section.
If you need detailed information about how to build a target group please refer to the Selecting Email Recipients chapter in the Emails section.
Step 2c. Send your email
Click Next on the Recipients page to go to the Send Emails page.
If needed, test the email first and then send it. For short instructions on testing and sending emails please refer to the Sending Email chapter in this section.
If you need detailed information about how to test an email please refer to the Testing Emails chapter.
If you need detailed information about how to send an email please refer to the Sending Emails chapter.
Step 3. Analyze Results
You can start analyzing the results of your questionnaire by clicking the Answers counter in the list of questionnaires. It contains the statistics of answers in a graphical form. The pane lists all the questions and counts of answers selected by customers:
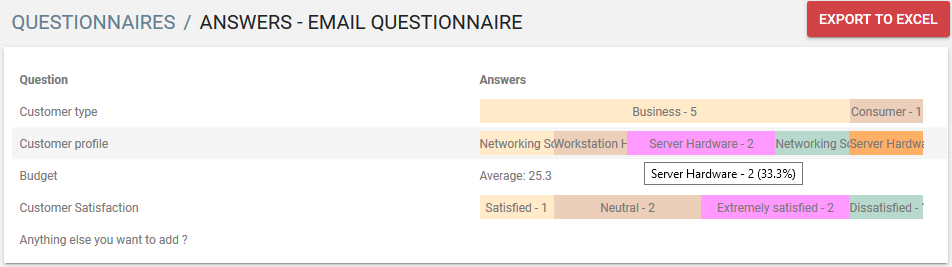
If you need to analyze answers in even more detail you can do this by exporting answer data into an Excel file.
For more information about analyzing questionnaire results please refer to the Analyzing Results chapter in the Other section.
How to Use Hidden Fields in Vine Forms
Often, you have a complex interactive process on your site. For example, you might have a custom test or a presentation done with JavaScript where you, first, communicate with the user and gather some data. Then you want to ask the users for contact data and send data them.
This can be easily achieved with Vine forms and here is some guidance how to do this step by step:
- Create a simple Vine contact form that will
- identify the user or ask for email if the user is anonymous
- have hidden fields such as Event Description. Which you can fill with your custom data using JavaScript (for example, your test results).
- Create an email to be sent when the form is submitted.
- Create an automation rule that will trigger on the form submit and send the email with test summary.
(Of course, there could be other variations. For example, you can use your own custom JavaScript form to ask for the contact data, use JavaScript code to fill a totally hidden Vine form and then submit it using JavaScript).
Step 1. Creating Vine form
Create a contact Vine form which will identify the site visitor and ask for email (and, possibly, other contact data) if the user is anonymous. Add a field which will be hidden and where you will enter your custom data to be later sent to the visitor.
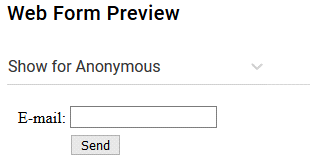
In the following sample form, the Event Description field is used as a hidden one. (If, for example, number values are needed then any of the person custom number fields can be used.)
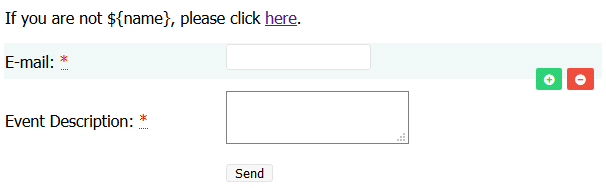
(Do not forget to clear the Mandatory flag from the hidden field as this will prevent the form from submitting.)
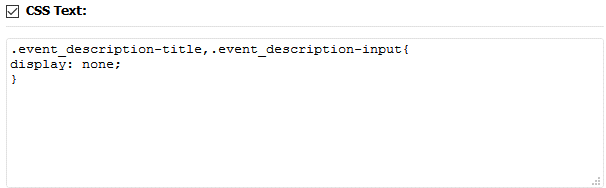
To hide the Event Description field, you can use the following CSS:
You can fill the hidden field with your data using the following JavaScript:
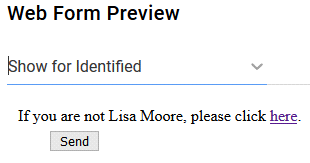
document.getElementById('event.description').value='sample data'It is recommended to preview your form for the identified and anonymous users:
Step 2 . Creating Email
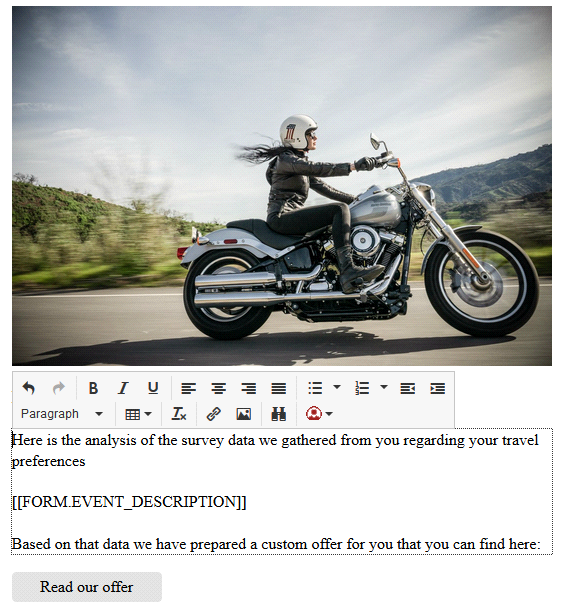
Create an email where you can insert data from the hidden form field using the [[FORM.FIELD]] syntax.
For example, if you are using the Event Description field to store your data then you can insert the data in email using the [[FORM.EVENT_DESCRIPTION]] tag:
Step 3. Creating Automation Rule
Create an automation that will trigger when your site visitor submits the form and then will send the email with the data from the hidden field:
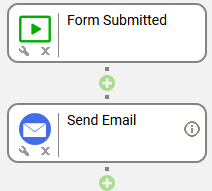
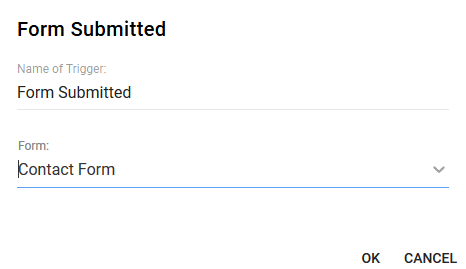
When creating, the Form Submitted trigger please select the form you created in step 1.
When creating the Send Email action you need to select the email you created in step 2:
Enable the automation rule and verify its settings. Consider carefully what you need to select from the How many automations to run setting. For automations started by a form submit, you normally should select All started: